Intel Driver Utility Download: Legacy and Updated Tools Explained
Follow these easy steps to install the Intel driver updater

The Intel Driver Utility download has gone through major changes. The original Intel Driver Update Utility is now outdated and no longer supported. In this guide, we’ll show you how to use both the modern Intel Driver & Support Assistant (DSA) and the legacy utility for older systems. Whether you’re updating new hardware or maintaining an older PC, you’ll find step-by-step help right here.
How to download Intel Driver Utility
Table of contents
Option 1: download and install Intel Driver and Support Assistant (Updated Version)
- Launch your browser, and go to the official Intel download site to download the Intel Driver & Support Assistant.
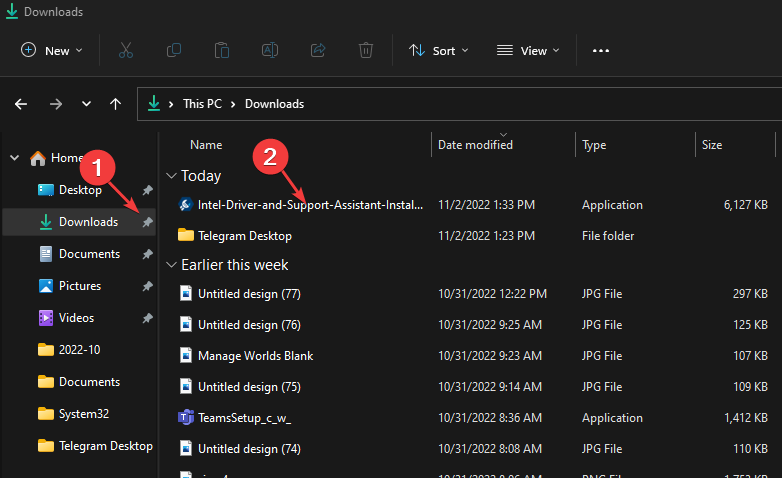
- Press the Windows + E keys to open File Explorer. By default, the .exe file should be in the Downloads folder, then launch it.
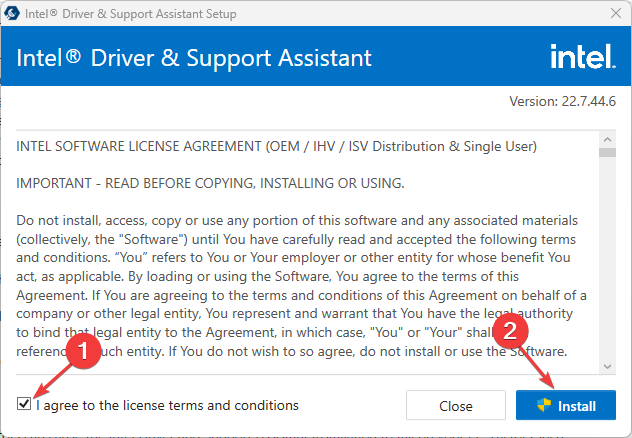
- Check the I agree to the license terms and conditions, then click the Install button and confirm the UAC prompt.
- Wait for the installation to complete and click Restart to effect the changes.

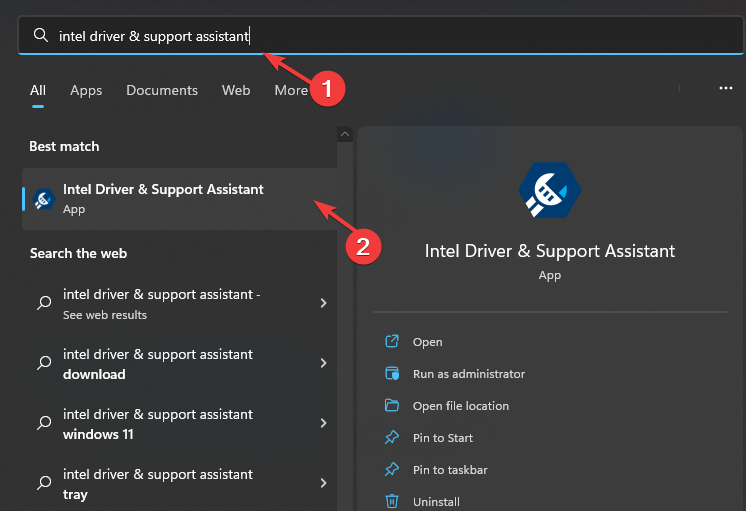
- Left-click the Start button, search for intel driver & support assistant and launch it.
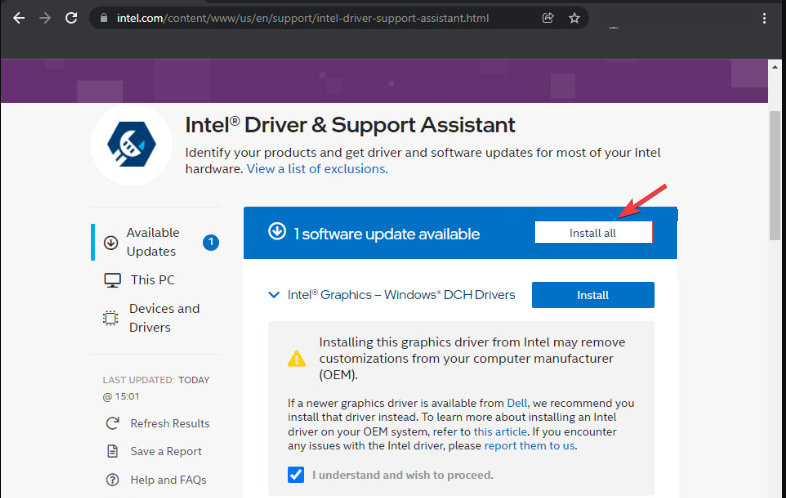
- Click Download all and check the box for I understand and wish to proceed.
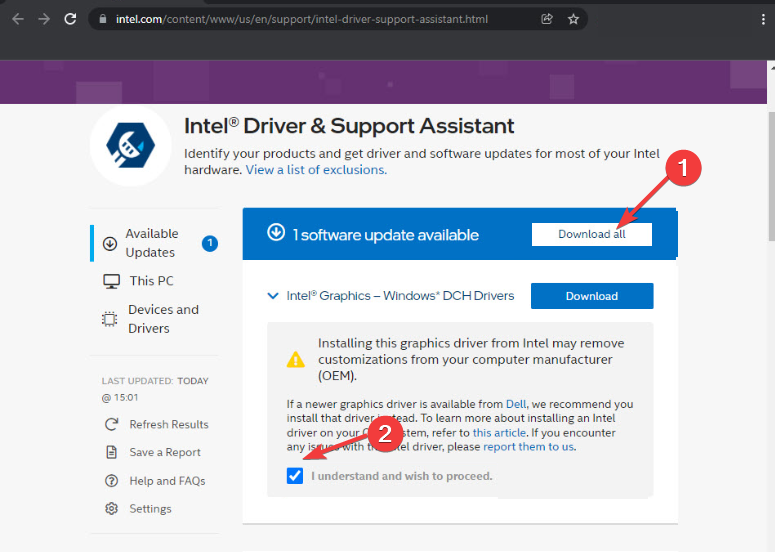
- Then click Install all and wait for the process to complete.
- Also, the utility will inform you once there are new updates via your device’s notification.
This is the best way to get Intel’s driver updater and use it. So, we recommend that you follow the steps strictly for optimal results.
Option 2: Download and Install Intel Driver Utility (the Legacy Version)
 NOTE
NOTE
- Visit FindMySoft’s Intel Driver Utility 2.8.1.9 page.
- Download the installer (approx. 9.7 MB).
- Make sure .NET Framework 4.5 is installed.
- Launch the tool and run a Scan.
- Choose which drivers you want to install.
What can I do if the Intel Driver and Support Assistant installation fail?
Many factors can cause the Intel Driver and Support Assistant installation to fail on your PC. Factors such as an outdated Windows operating system, low disk space, startup errors, etc., can cause issues with the installation.
If you experience more issues, go on with the solutions below:
- Troubleshoot your PC in clean boot.
- Temporarily disable Windows Defender Firewall.
- Update your Windows OS.
In conclusion, you can learn how to fix the Intel Services crash on Windows 10/11 by following our guide.
Also, if your Intel Smart Sound Technology driver is not working, check our article to fix the problem. We also wrote a guide on what to do if the Intel Driver Support Assistant is not working, so don’t miss it.
Many users reported that the Intel Driver Support Assistant is not downloading, but we have a guide that tackles this issue. Moreover, if you encounter a scan failure, we can help you out.
And for other PC users who prefer another brand, you can download the Dell Command Update to keep your drivers updated.
Should you have further queries or suggestions, kindly use the comments section below.
Read our disclosure page to find out how can you help Windows Report sustain the editorial team. Read more


Improve this guide


User forum
0 messages